Why choose a dog toy with three squeakers for your pup? Understand the benefits of extra squeaky fun during playtime.
Alright, let me tell you about this dog toy project I tackled recently. My dog, Buster, he's absolutely nuts about squeaky toys. The problem is, the store-bought ones just don't last. He goes through them like crazy. Plus, most only have one squeaker, and once that's gone, he loses interest. So, I got this idea: what if I made him a toy with three squeakers? More squeak, more fun, right?
Getting Started
First things first, I had to dig through my craft supplies. Found some decently tough fabric – an old pair of jeans I wasn't wearing anymore. Perfect. Denim's pretty sturdy. Then I needed the squeakers themselves. I actually had a few spares lying around that I'd salvaged from toys Buster had already demolished. Waste not, want not! And of course, some stuffing, thread, and my trusty needle. Didn't feel like dragging out the sewing machine for this, figured hand-sewing would be fine.
Putting it Together
So, I started by cutting out two identical shapes from the denim. Nothing fancy, just a kind of long bone shape, simple enough. Laid them flat, right sides facing each other.
Then, I began stitching around the edge. Did a basic backstitch mostly, trying to keep it tight so the stuffing wouldn't immediately pop out. Left one of the short ends open, obviously, so I could turn it right side out and stuff it.
Turning it right side out was a bit fiddly, especially with the denim, but got there eventually. Then came the fun part: stuffing. I started adding the stuffing, pushing it down into the 'ends' of the bone shape. As I stuffed, I strategically placed the three squeakers inside. Put one near each end, and one right in the middle. Had to make sure there was enough stuffing around them so Buster couldn't feel them too easily, but not so much that they wouldn't squeak.
- Packed stuffing in one end.
- Added the first squeaker.
- Added more stuffing towards the middle.
- Placed the second squeaker (the middle one).
- More stuffing.
- Put the third squeaker near the other end.
- Finished packing stuffing around it.
Once it felt sufficiently plump and squeaky in all three spots, it was time to close it up. This is always the trickiest bit, making it look neat. Tucked the raw edges of the opening inwards and did my best to stitch it shut securely. Used a ladder stitch, or tried to anyway, to make the seam less obvious. Doubled up the thread for extra strength.
The Big Test
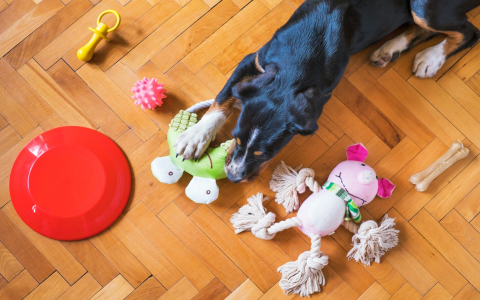
Okay, moment of truth. Called Buster over. He saw the new toy and his tail immediately started going. I gave it a squeeze – squeak, squeak, squeak! He got excited. Tossed it to him.
He grabbed it and immediately started chomping down, trying to find those squeakers. It was pretty funny watching him figure out there wasn't just one, but three different spots that made noise. He'd chew one end, make it squeak, then move to the middle, squeak, then the other end, squeak! Kept him busy for quite a while.
So far, it's holding up better than expected. The denim is definitely tougher than the usual plush material. And having three squeakers seems to be a hit. Even if he eventually silences one, there are still two more to go for!
Honestly, pretty pleased with how this little experiment turned out. Took maybe an hour or so, used up some old materials, and Buster got a custom toy he seems to really enjoy. Might have to make another one soon.