What is the best hide and seek dog toy? Check out these awesome puzzle toys your furry friend will love.
Alright, let me tell you what I got up to this weekend. My dog, Buster, he's a good boy, but man, he gets bored easy. Just stares at me sometimes. So I figured, maybe I could make him one of those puzzle toys, you know, the ones where they have to pull little things out of a bigger thing.
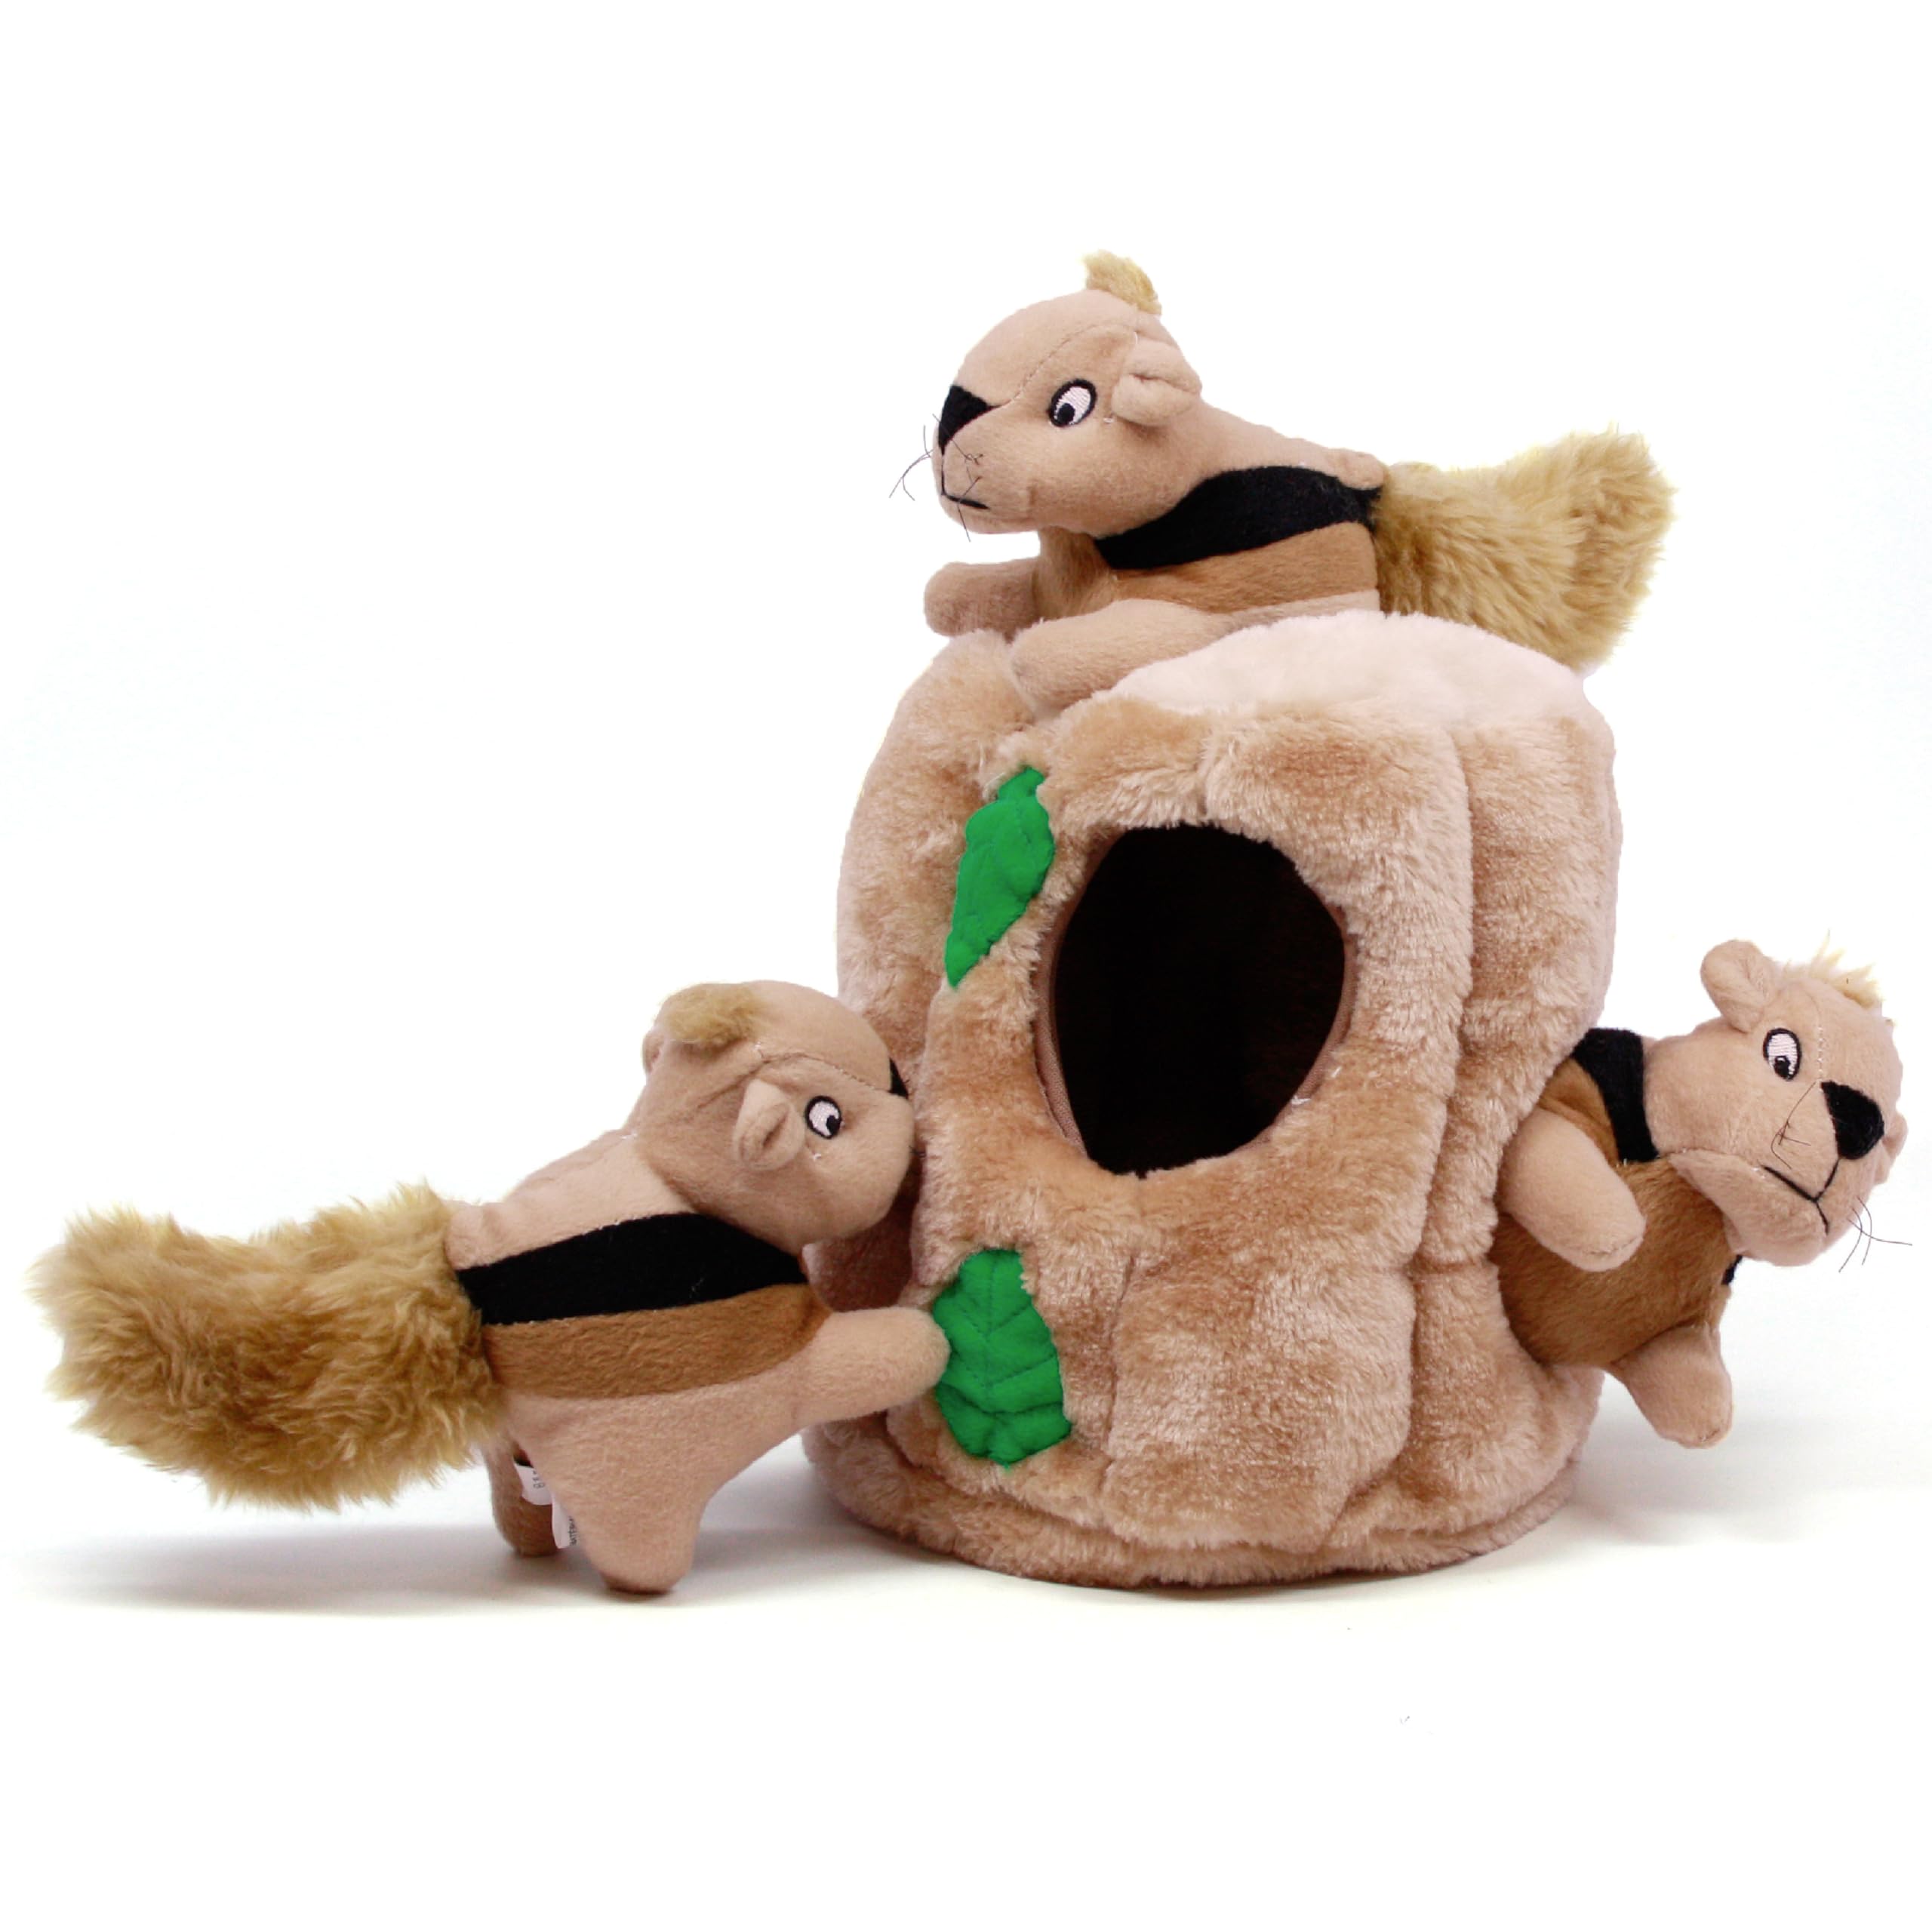
Getting the Stuff Together
I didn't want to spend money, that's the key thing here. I went rummaging through the closet where all the old fabric scraps end up. Found some sturdy canvas from an old bag project, perfect for the main part. Then grabbed some softer fleece bits in different colors – those would be the little hidden toys. Also needed scissors, needle, strong thread (important, Buster chews!), and some stuffing from an old pillow I was gonna chuck anyway.
Making the Main 'Hiding' Part
So, I decided on a sort of log shape. Seemed easy enough. I cut a big rectangle from the canvas. Folded it in half, long ways, and started sewing up the long side and one end. Getting the needle through the thick canvas was tough work, not gonna lie. My fingers were sore. Before sewing the last end shut, I stuffed it pretty firmly with the pillow fluff. Then stitched that end closed too. Now I had a basic stuffed log.
Next, I needed the holes for hiding the little toys. I just took my scissors and carefully cut three circles into one side of the canvas log. Didn't make them too big, wanted it to be a bit of a challenge for Buster. I stitched around the edges of the holes quickly just to stop them fraying too much right away.
Crafting the Little Critters
This was the fun bit. Using the fleece scraps, I cut out some simple shapes – kinda like little squirrels or chipmunks? Nothing fancy, just two identical shapes for each one. Put the two pieces together, right sides facing in, and stitched almost all the way around. Left a small gap. Turned them right side out, pushed a tiny bit of stuffing in each one (didn't want them too bulky), and then stitched the gap closed. Made three of these little guys.
The Big Reveal (for Buster)
Okay, moment of truth. I took the three little fleece critters and stuffed them into the holes I'd cut in the canvas log. Showed it to Buster. He sniffed it all over, looked at me like, "What's this, then?". I nudged one of the little toys so it was sticking out a bit. That got his attention!
He started pawing at it, biting at the log, trying to figure out how to get the little guys out. Took him a few minutes, lots of sniffing and nudging, but he eventually pulled the first one out! He looked so proud of himself. Then he went right back for the others. Kept him busy for a good while, which was exactly the plan.
Was it Worth It?
Yeah, totally. Didn't cost a penny, just used scraps I already had lying around. Took maybe an hour or so of my time. And seeing Buster actually playing with it, using his brain a little bit instead of just chewing mindlessly, that was great. The stitching around the holes needs reinforcing already, he's pretty rough, but that's easy enough to fix. Definitely a successful little project.