Need a toy that lasts? This tough squirrel dog toy is great for dogs who love to chew hard.
Making a Squirrel Toy for the Dog
Okay, so the dog's been absolutely obsessed with the squirrels in the backyard lately. Just sits at the window, whining. I saw some plush squirrel toys online, but honestly, they looked a bit flimsy, and I thought, "I could probably whip something up myself." So, that's what I decided to do this afternoon.
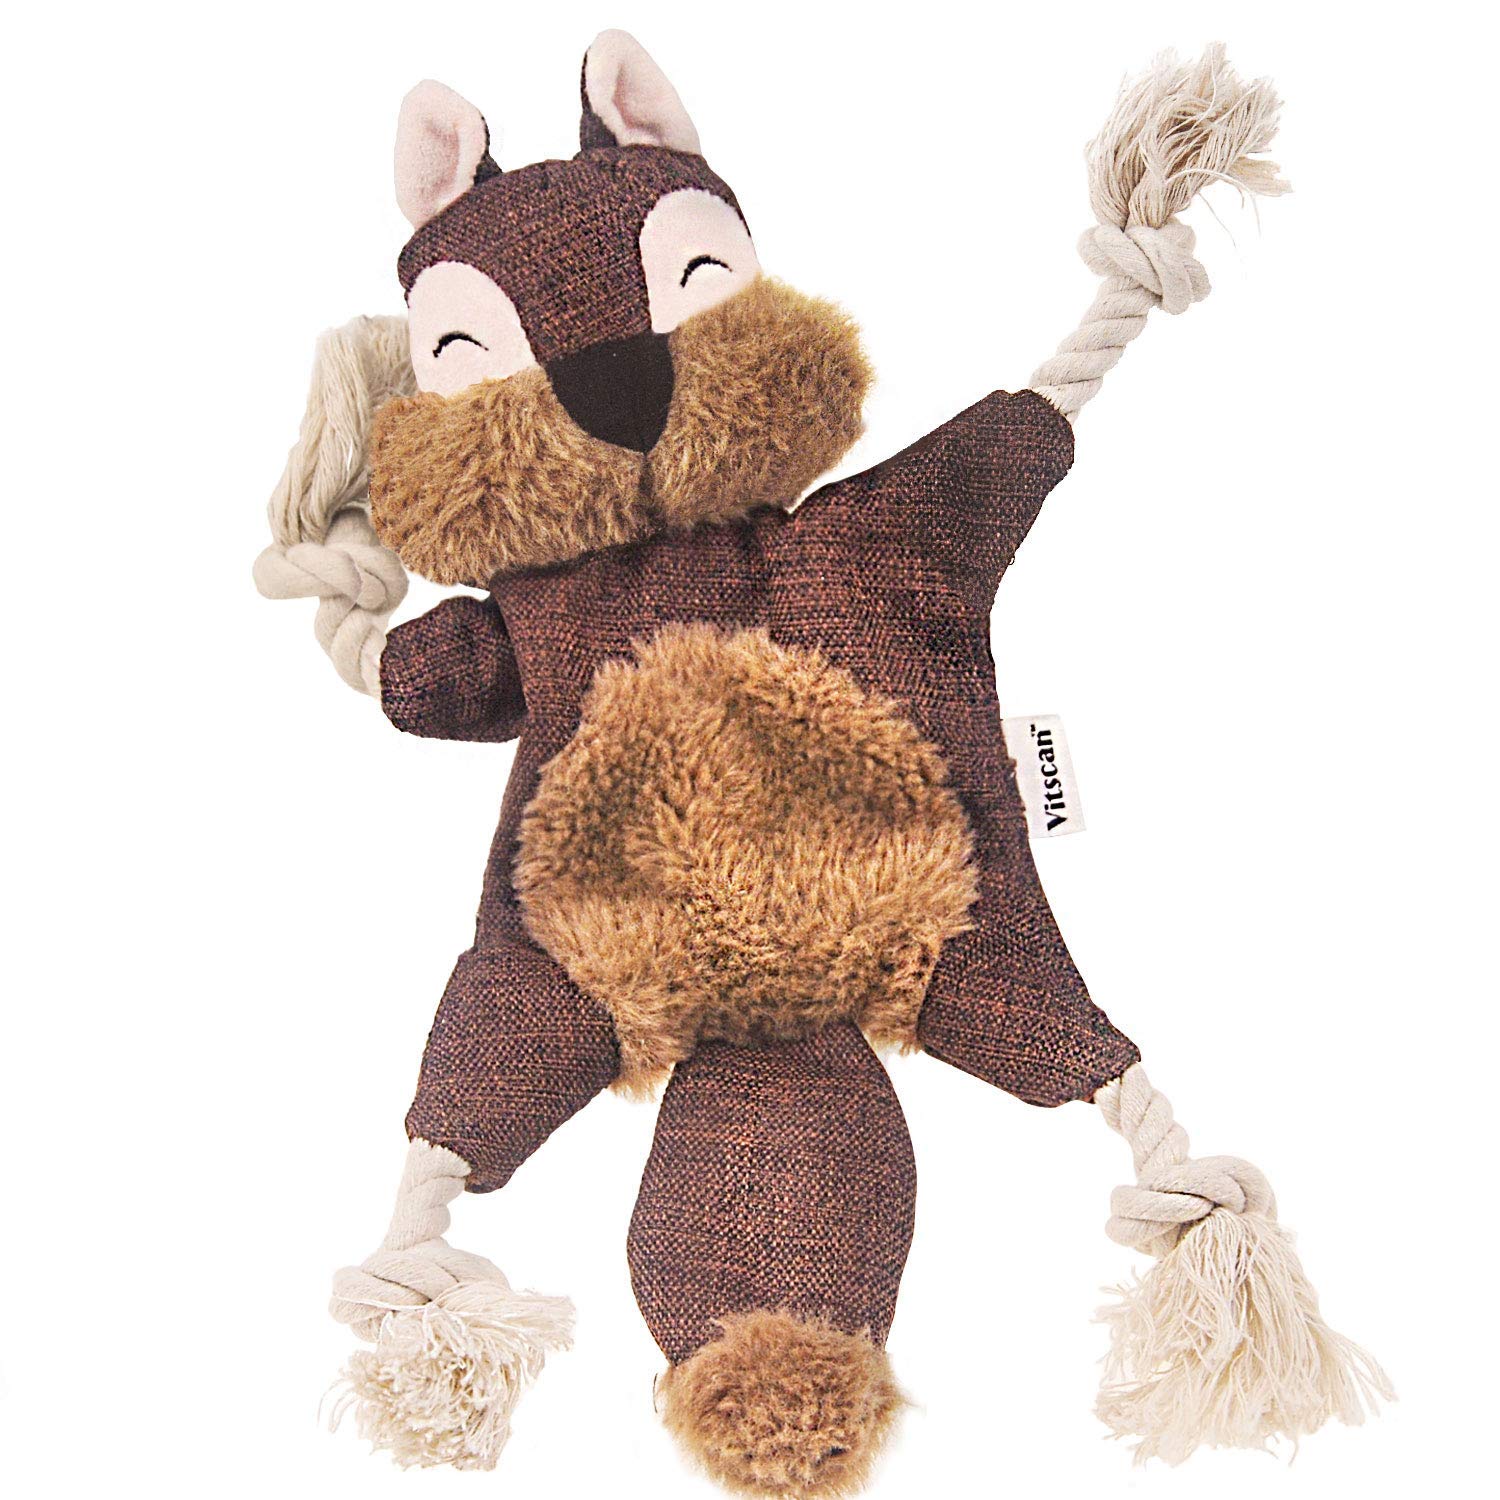
First thing, I went digging through my old fabric stash. Found some brown corduroy that seemed sturdy enough – figured it might last more than five minutes. Also grabbed some lighter tan scraps for the belly and tail underside. Needed stuffing, of course, and I knew I had a bag of poly-fill leftover from some pillow project. And the most crucial part: a squeaker. Found a couple saved from old toys the dog had already demolished.
Getting Started
Didn't bother with a fancy pattern. I just kinda sketched a basic squirrel shape onto a piece of paper. You know, head, body, big bushy tail shape. Nothing too detailed. Then I laid the corduroy out, folded it over, and pinned my rough paper shape onto it. Cut out two identical body pieces.
Then I took the lighter tan fabric and cut out a belly piece and an underside for the tail, just eyeballing the shapes against the main brown pieces I'd already cut.
Putting It Together
I decided to sew the belly patch onto one of the main body pieces first. Used my sewing machine for the main seams because hand-sewing takes forever, and let's be real, the dog doesn't care about neat stitches. Lined up the two main brown body pieces, right sides facing each other, with the belly patch now attached to one side. I sewed almost all the way around the edge, leaving a gap along the back for turning and stuffing.
Before turning it right-side out, I snipped a few notches around the curved bits – helps it lay flat later. Then, the slightly tricky part: turning the whole thing through that small gap. Took a bit of pushing and pulling with my fingers and the blunt end of a pencil.
Stuffing and Finishing
Once it was right-side out, I started stuffing. Pushed small bits of poly-fill in, making sure to get into the head and tail areas first. Tucked the squeaker somewhere in the middle of the body, surrounded by stuffing so it wouldn't be immediately punctured (or so I hoped).

- Pushed stuffing into the head.
- Added the squeaker to the main body cavity.
- Filled the tail nice and full.
- Made sure the whole thing was plump but still squishy.
Finally, I folded the raw edges of the gap inward and carefully hand-stitched it closed. Tried to make those stitches small and tight so stuffing wouldn't escape too easily. Didn't bother with eyes or nose – just kept it simple fabric. Safer that way, I reckon.
The Big Reveal
Took the finished squirrel toy into the living room where the dog was snoozing. Gave it a good squeak. Well, his head shot right up! I tossed it, and he pounced. Started shaking it like crazy, squeaking it non-stop. He seemed pretty thrilled with it, carried it around for a good while.
So yeah, that was my little project. Took maybe an hour or so. Used up some old fabric scraps, and the dog got a new toy he actually seems to like. We'll see how long this one lasts, but it felt good making something myself instead of just buying another plastic thing from the store.