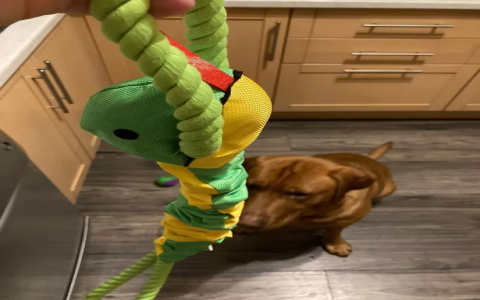
Need a toy for a large breed? This durable snake dog toy is perfect for bigger dogs.
Alright, let me tell you about this snake toy I put together for my dog the other weekend. You know how it is, you buy toys, they last maybe a day, maybe less if your furry friend is really determined. I got tired of shelling out cash for something that ends up as fluff on the carpet.
Getting Started
So, I was digging through my old craft box, looking for something else entirely, and found a bunch of leftover fleece fabric. Different colours, decent sizes. And I thought, why not try making something myself? Max, my golden retriever, loves those long, floppy toys he can shake around. A snake seemed like a good bet – simple shape, lots of flop potential.
The Making Process
First, I grabbed a few pieces of the fleece. Didn't really measure anything, just sort of eyeballed a long, wiggly snake shape. I laid two different coloured pieces on top of each other, right sides facing in, you know the drill if you've ever sewn anything. Sketched a rough snake outline onto the top piece with some chalk.
Then I just cut it out, through both layers. Gave it a bit of a thicker body so I could stuff it well. Head was just a rounded end, tail tapered a bit.
Next up was the sewing machine. Hauled it out, dusted it off. Took me a minute to get the tension right, always does. Started sewing around the edge, maybe half an inch in from the cut line. Followed my chalk line mostly. Left the tail end open, needed a way to turn it right side out and stuff it.
Adding the Fun Bits
Before turning, I remembered I had some squeakers salvaged from old destroyed toys. Knew Max would love that. So, I spaced a few of them inside along the body length, just tucked them in loosely for now. Then I carefully turned the whole fabric tube right side out. Had to use a wooden spoon handle to poke the head out properly.
Stuffing time. I used filling from an old pillow that was heading for the bin anyway. Just started pushing handfuls in, working it down towards the head. Tried to get it evenly distributed but not packed too tight – wanted it floppy, remember? Made sure the squeakers were nicely embedded in the stuffing as I went.
- Cut the fabric (two layers, wiggly shape).
- Sewed around the edge, leaving an opening.
- Tucked in some squeakers.
- Turned it right side out.
- Stuffed it with old pillow filling.
Finishing Touches and The Verdict
Once it felt about right, I tucked the raw edges of the open end inwards and hand-stitched it closed. Used some strong thread, doubled up, hoping it would hold for a while. Didn't bother with eyes or anything fancy – Max doesn't care, and it's just something else to chew off.

So there it was, my homemade snake toy. Looked a bit lumpy, stitching wasn't perfectly straight, but hey, it was done. Called Max over. He gave it a good sniff, grabbed it right in the middle, and started thrashing his head back and forth like a maniac. The squeakers were a big hit. He paraded it around the house for a bit, seemed pretty pleased.
Honestly, it was pretty satisfying to make something myself, using up old stuff. Took maybe an hour? And seeing the dog enjoy it made it worth the effort. How long will it last? Who knows, probably not forever. But at least this one didn't cost me fifteen quid. Might even make another one when this one eventually bites the dust.